


Top 5 tips to Connect a Laptop to a Digital Projector


Multimedia Projector and Media Player with Remote
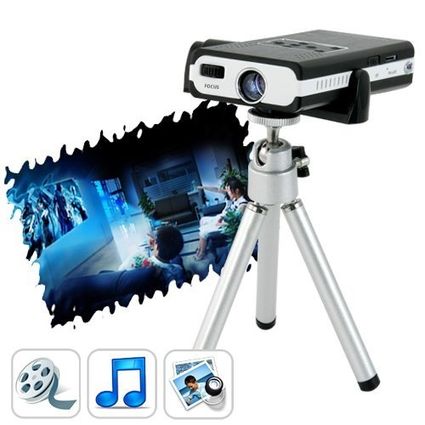
Manufacturer Specifications
Primary Function: Mini portable multimedia projector and media player with remote control and external antenna
Display Technology: LCoS (Liquid Crystal on Silicon)
Screen Resolution: 640 x 480 pixels
Contrast ratio: 80:1
Projection distance: 21 to 180cm
Projection image size (diagonal): 6to50 inches
Projection Brightness: 15 lumens
Built-in Speaker: Yes (0.5W)
Built-in Flash Memory: 4GB
External Memory: Supports up to 8GB micro SD/TF card (Not included)
Lens Adjustment: Manual Focus
Bulb Life: 20,000 hours (Average)
Battery Life: 1.5 - 2 hours, depending on use
Pico Pro - Mini Projector For Laptops (VGA,SD,A/V,800x600)
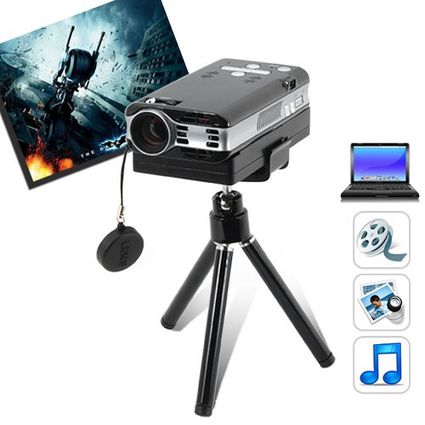
Manufacturer Specifications
Primary Function: Mini projector with VGA, SD and A/V inputs
Display Technology: LCoS (Liquid Crystal on Silicon)
Native Resolution: SVGA 800 x 600 pixels
Contrast Ratio: 1000:1
Aspect Ratio: 4:3
Viewing Angle: 33.4 degrees
Projection image size (diagonal): 7 to 80 inches
Projection Brightness: 30 ANSI lumens, 40-45 peak lumens
Built-in Speaker: Yes (1W)
Built-in Flash Memory: 2GB
External Memory: Supports memory expansion with micro SD/TF card slot
1. Determine what ports exist on the laptop computer for cable connection. A typical laptop will utilize the VGA, S-Video and audio connections. The ports for these connections are at the rear or side of the laptop chassis.
2. Look at the projector's connection ports for the same connections. They are either color coded to match common connections, or the plug will only fit one way into the correct port. Connect the audio jack to the line out on the laptop and into the audio in jack on the projector.
3. Connect the laptop's power cord and plug into the AC wall socket to provide power during the use of the projector. This step saves battery power.
4. Open the utility that operates the presentation and ensure the connections are correct and complete. Use the Display settings in a Windows operating system to toggle between the laptop's monitor and second video monitor.
5. Check the presentation on the laptop's screen to ensure the program is running properly. Activate the presentation and the projector will display the presentation on the wall or screen.
Tagcloud: Top 5 tips, Laptop , Digital Projector ,Spy Cameras , Multimedia Projector , Media Player
More info , welcome refer to: http://www.top-shoppingmall.com/home-audio-video-1.htm


|
|
