Install Team Foundation Server 2012 with Advance
Why Use Advanced?
If you want to change the default installation options for Team Foundation Server, use the advanced configuration, which lets you configure Team Foundation Server on multiple servers and change many other options.Why use advanced? The standard installation might not fit your needs. You might want to customize a single server installation or install Team Foundation Server and its configuration database on different servers. Perhaps you already have SQL Server or SharePoint Products running in your organization and you’d like to use one of these installations to host team projects or the data for Team Foundation Server. If you use the optional features that require prerequisite server software, these installations can also be hosted on different servers. If you use multiple servers, you can distribute the load between Team Foundation Server and the configuration database, or you can ensure that prerequisite server software for features such as reporting or the portal site is running on capable hardware.
Don’t confuse the multiple server installation with the robust scale-out features that Team Foundation Server offers. These scale-out features include the ability to create a Team Foundation Server farm and add a team project collection to an instance of SQL Server that was not part of the original deployment of Team Foundation Server. However, these scale-out features are not part of this scenario. This scenario offers you guidance for an initial deployment of Team Foundation Server that takes advantage of configurable installation options, such as installing TFS on more than one server. For more information about how to add an application-tier server to your deployment of Team Foundation Server, see How to: Create a Team Foundation Server Farm (High Availability).
TIP: A multiple-server installation requires an Active Directory domain and domain accounts or the Network Service account. You cannot use local accounts for service accounts.
Required permissions
To install TFS, you must be a member of the Windows Administrators security group.
To run any of the TFS configure wizards, you must be a member of the Windows Administrators security group on the server on which you will install Team Foundation Server. If you plan to configure reporting, you must also be a member of the Windows Administrators security group on the server that is running SQL Server Reporting Services. If you plan to configure SharePoint Products, you must be a member of the Farm Administrators group on the SharePoint Products administration site. If you did not install the Database Engine that will host the configuration database or a database administrator manages the instance of SQL Server that you are using, you must be a member of sysadmin Server role in SQL Server.
TIP: If you or your database administrator want a better understanding of the required SQL Server permissions, see the following page on the Microsoft website: Why does TFS need so much privilege on the SQL Server? (Brian Harry blog post)
To run the Team Foundation Server installer
1) Insert the Team Foundation Server DVD in the drive and launch the tfs_server.exe.
2) On the license terms dialog box, accept the license terms and then choose Install Now.
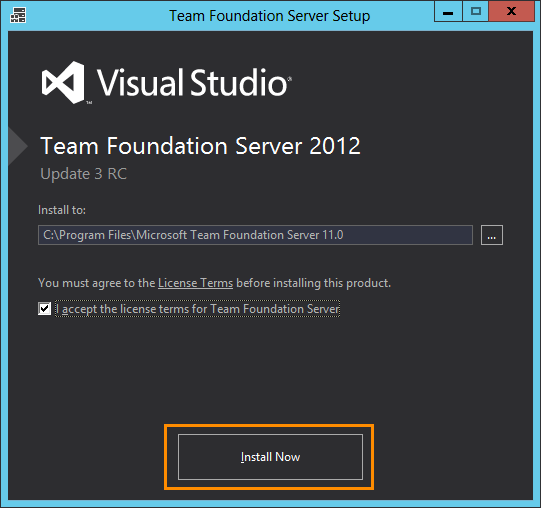
If you want to install Team Foundation Server to a specific location in the file system, choose the browse button (…) next to the default install location.
After TFS installs, some installations prompt you to enter a license key or accept a trial license.
To configure Team Foundation Server using the advanced configuration
1) In the Team Foundation Server Configuration tool, choose Advanced, and then choose Start Wizard.

2) Read the Welcome screen, and then choose Next.
3) In SQL Server Instance, type the name of the server that is running SQL Server or the named instance that will host the configuration databases, and choose Next.

You can also perform any of these optional steps:
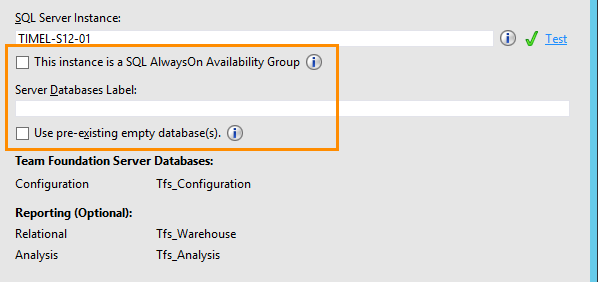
* Select This instance is a SQL AwlaysOn Availability Group to specify that the SQL Server instance is an Availability Group Listener (AGL) and its availability group will host the TFS databases created during set up. See Use SQL Server 2012 Always On Availability Groups with Team Foundation Server.
* In Server Database Label, type a label string, which is then embedded into all three of the default database names. This technique enables you to use a single instance of SQL Server to host multiple configuration databases.
* Select the Use pre-existing empty database(s) check box, and then specify databases that are hosted on the server that is named in SQL Server Instance. You must create names for these databases by using the default naming structure, with or without a label. You can find the default naming structure under Team Foundation Server Databases.
* Choose Test to test the connectivity to SQL Server.
4) Under Service Account, choose Use a system account to use a built-in account.

Otherwise, choose Use a user account to use a domain or local account. If you are using a user account, you must type the password. To test the user account and password combination, you can optionally choose Test. Network Service is the default value for this service account.
If your report server and SharePoint servers are not installed on the same server as TFS, you should add this account to the Farm Administrators group (for SharePoint) and the content manager group on the report server. If you’re installing TFS on the same server as the report server and SharePoint, this account is added to these groups automatically.
5) Under Authentication Method, choose NTLM.

Otherwise choose Negotiate (Kerberos) and then choose Next. If you choose NTLM, NTLM authentication is used. This option is the default setting. If you choose Negotiate (Kerberos), Kerberos authentication is attempted first. If that attempt fails, NTLM authentication is used.
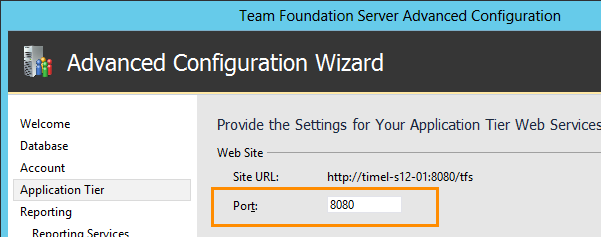
6) Under Web Site, you can use the default value in Port. This the port number used to connect to Team Foundation Server. The default value is 8080.
7) Under IIS Virtual Directory, you can use the default value of tfs or optionally type a virtual directory name.

8) Under Web Site, note the Team Foundation Server site URL, which is dynamically assembled based on your input in Web Site and IIS Virtual Directory. Clients use this URL to connect to Team Foundation Server. Choose Next.

On a client operating system, you must skip to step 11. You can’t add a portal or reporting (steps 9 and 10) on a client operating system.
9) Select the Configure Reporting for use with Team Foundation Server check box to use reporting, or clear the check box to skip reporting, and then choose Next.

A) Type the name of the server that is running SQL Server Reporting Services in Reporting Services Instance and choose Populate URLs. The URLs for the report server and its management site appear in the drop-down lists for Report Server URL and Report Manager URL.

B) Ensure the values displayed are the URLs that you want to use for Team Foundation Server and choose Next.
C) Type the name of the server that is running SQL Server Analysis Services in SQL Analysis Services Instance and choose Next. To test the connectivity to SQL Server, you can optionally choose Test.

D) Type the name and password of the report reader account and choose Next.

If you specified a user account for the service account of Team Foundation Server in step 4, you must select the Use a different account than the Team Foundation Server service account for the report reader account check box to use a different account. To test the user account and password combination, you can optionally choose Test.
10) Select the Configure SharePoint Products for use with Team Foundation Server check box to use SharePoint Products, or clear the check box to skip SharePoint Products. Choose Next.

If you selected the check box to configure SharePoint Products, you get a screen with two options. Choose Use the default SharePoint location if you’ve installed and configured SharePoint on the server where you’re installing TFS and choose Next.
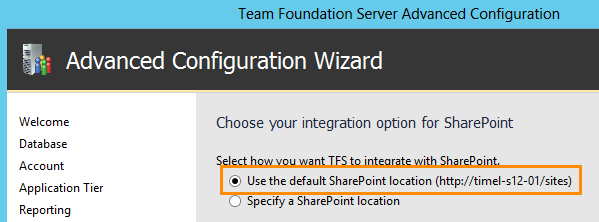
Other possible options for SharePoint:
If you’ve installed SharePoint on a remote server, you can click Specify a SharePoint location. On the next screen you’ll enter the Site and Administration URLs for SharePoint farm you want to integrate with TFS. You’ll want to read the section on setting up a remote SharePoint site for TFS. See, What If I Already Have SharePoint?
TIP: If you’re installing on Windows Server 2008 or R2, you get an option to install SharePoint Foundation 2010. Once the installation completes, type a user account and password for the service account for SharePoint Foundation 2010. If you specified a user account for the service account of Team Foundation Server in step 4, you must select the Use a different account than the Team Foundation Server service account for the SharePoint farm check box to use a different account.
11) Select the Create a new team project collection check box to create a collection, or clear that check box to skip that step. If you create a collection, accept the default values, or type a new name and description. Choose Next.

12) On the Review page, review the settings, and choose Next.
The wizard validates your configuration.

If you run into a problem, you can use the detailed results to identify the issue. If you can fix it, click the link to run the checks again.

13) After you pass all the checks, choose Configure. The wizard applies configuration settings. This process might take several minutes.
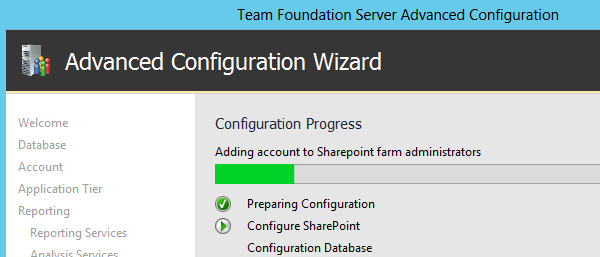
14) At the success screen, choose Next.
15) Review the results of the success screen, including the connection URL for TFS and any details about the installation. Choose Close.

In the TFS Configuration Center, note that TFS extensions for SharePoint have already been installed, if you installed TFS and SharePoint on the same server.
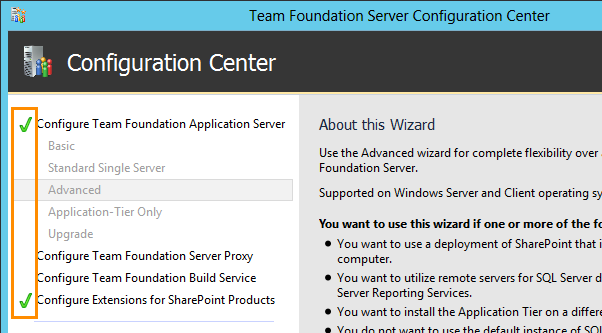
After you close the TFS Configuration Center, the Team Foundation Server Administration Console appears.
HAPPY CODING
KARTHIK KUSALRAJ
|
|
