


Finally, you should be presented with a summary of the install actions to be performed and hitting Next again should begin the installer:
Blogs >> Technology >>
JAX-WS on Websphere
JAX-WS on WebSphere 6.1
This post will walk you through the process of installing WebSphere 6.1, and the installation of web services feature pack and updates to get going with the JAX-WS. Due to the complexity of the process of installing not only these feature packs into Websphere 6.1, but the updates that must be installed as well, I have tried to document all those steps for you in an easy-to-follow format below.
Required Software
Please make sure you have the software components listed below, before you start with the installation.
(1)WebSphere Application Server 6.1 Install
(2)WebSphere Update Installer 6.1.0.13
(3)WebSphere Application Server 6.1.0.13 Update PAK (6.1.0-WS-WAS-WinX32-FP0000013.pak file)
(4)WebSphere 6.1 Web Service Feature Pack
(5)WebSphere 6.1 PK53084 Interim Fix PAK (6.1.0.9-WS-WASWebSvc-IFPK53084.pak file)
(6)WebSphere 6.1 Web Service Feature Pack Fix PAK (6.1.0-WS-WASWebSvc-WinX32-FP0000013.pak file)
Install Websphere 6.1
Installing Websphere 6.1 is a fairly straight forward process. If you downloaded it in the form of a ZIP file, go ahead and unzip it. If you got a CD or DVD with it on it, insert the disk.
If the startup installer app doesn't launch and you need to launch it manually the name of the executable is launchpad.exe, you can double-click it to run it:
After Launchpad starts you want to click the first option, to run the WebSphere Application Server installer:

Once the installer has initialized itself and started up, you will see this screen
For the most part, taking the defaults and simply "Nexting" your way through the installation is fine

After the installer is done you can click Finish and then the First Steps console will open.
The frist thing to do with a new install of WebSphere Application Server is to click the Installation verification link off the First Steps console:
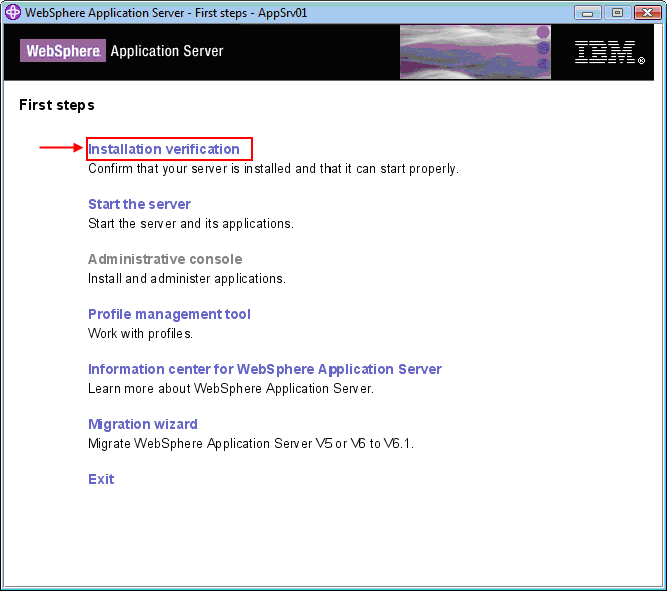
After clicking Installation verification, a console window will open up and WebSphere will be started, displaying it's startup log to the console window.
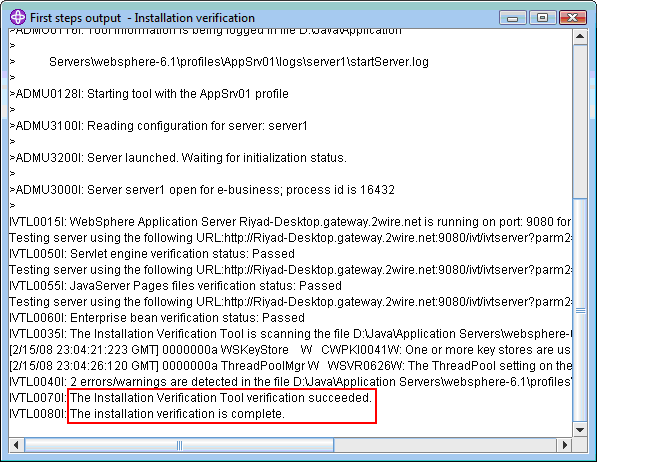
Once the installation has been verified, you can close the console window, and back on the First Steps console click Stop the server.
You can now close the First Steps console, your installation of WebSphere Application Server is complete.
Now you can hit OK and continue following the document for further steps. WebSphere Application Server is installed, verified and you are ready for the next steps
Install the WebSphere Update Installer
WebSphere Application Server updates are installed by using the WebSphere Update Installer to install PAK files that represent updates for the server.
To install the WebSphere Update Installer, either unzip the ZIP file you received or insert the CD or DVD in your computer. If the installer does not autostart for you, you may need to drill down to find it.
You will want to drill down into the UpdateInstaller directory and find the installer.exe file, then double click to run it:
After running install.exe the welcome screen for the WebSphere Update Installer will popup:
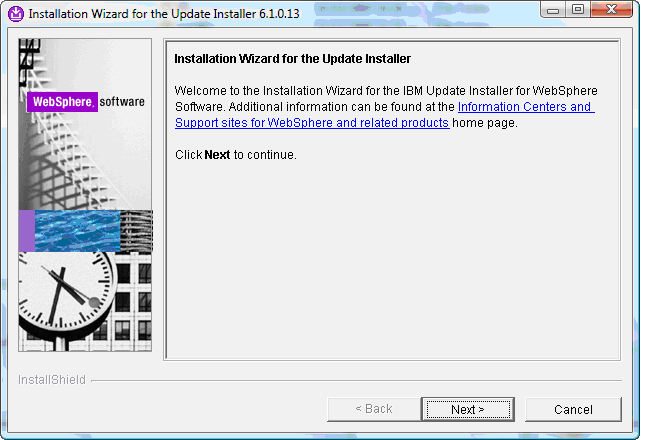
You can "Next" your way through the installer, selecting most all the defaults if you like. On the last page of the wizard, the installer asks you if you want to launch the WebSphere Update Installer, but for the time being we, uncheck that and click Finish for now:

We will actually run the Update Installer twice through out this document, first to apply the WebSphere Application Server 6.1.0.0 -> 6.1.0.13 patch, and then again to apply two separate patches (Interim patch and Web Service Feature Pack patch).
Applying WebSphere Update 6.1.0.13
This is the first update we will apply to WebSphere Application Server; it will update the server from version 6.1.0.0 to 6.1.0.13.
To apply this PAK file, as with any other PAK file, we have to download it, and move the PAK file into the maintenance directory of the WebSphere Update Installer. In our case, since we installed the Updater Installer into the C:\Program Files\IBM\WebSphere\UpdateInstaller directory, the directory we want to place PAK files is:
Once we drop the update PAK file ( 6.1.0-WS-WAS-WinX32-FP0000013.pak) into that maintenance directory, we run the Update Installer by double-clicking the update.exe file in that directory, or running it from the Start Menu:
After launching the Update Installer and hitting Next you will be asked for the installation directory of WebSphere Application Server. By default the Update Installer should have found it and is showing it to you, but double check to make sure it's correct.
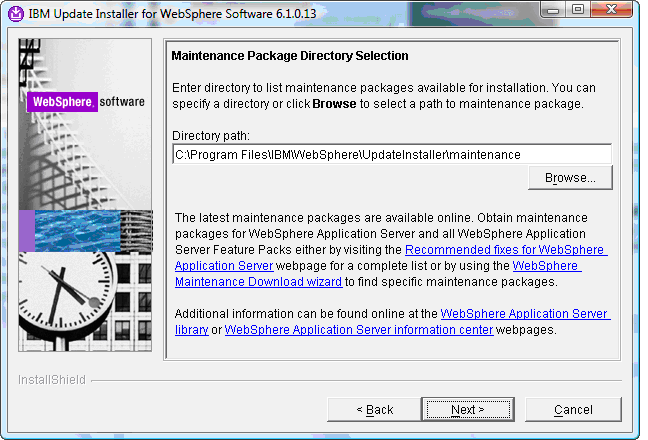
After hitting Next again you will be prompted if you want to Install or Uninstall a maintenence package, in this case we want the default which is Install. After hitting Next you will be asked for the directory containing your maintenance package files (PAK files), and as you remember we used the /maintenance directory under the Update Installer's install directory, which by default should be chosen and displayed to you:
After correcting the directory or confirming the default, the Update Installer will show you the update packs it has found and ask you to confirm/select the ones you want to install. In our case you should only have 1 update pack listed:
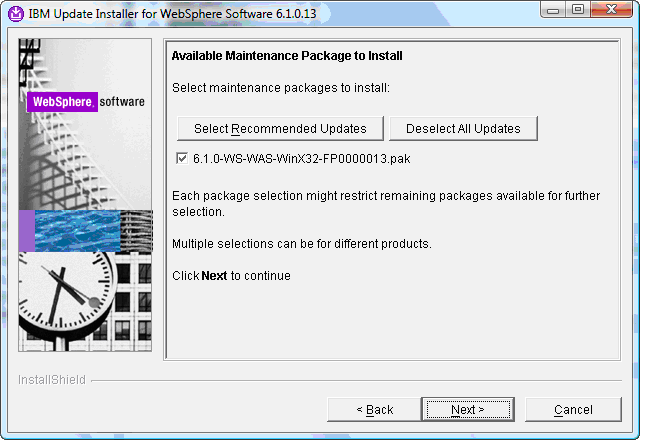
Hit Next, and the installer will verify the action you are about to perform and ask you to confirm it, go ahead and click Next again and the update process will begin:

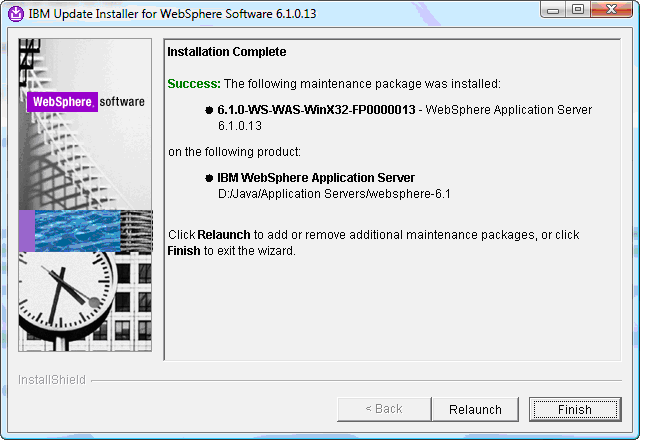
Once the update is done applying the Update Installer will confirm that the process is complete:
WebSphere Application Server is now upgraded to 6.1.0.13 and you are now ready to move on.
Installing the Web Service Feature Pack
Now that WebSphere is properly updated to the latest version, we are ready to install the Web Services Feature Pack, which will add support for the Java EE Web Service Specification: JAX-WS.
The Web Service Feature Pack is installed by way of a stand alone installer contained inside the ZIP or CD/DVD you have to install it from. Either unzip the ZIP file or put the CD/DVD into your computer, then find and run the installer.exe file if the installer doesn't automatically start. You might have a subdirectory named WEBSV you need to look in to find it:
After running the installer you will be presented with the welcome screen:
You can "Next" your way through the screens of the installation wizard, agreeing to the license, confirming your WebSphere Application Server directory installation path and then the wizard will begin installing the Web Service Feature Pack:

After the installation is complete, the wizard will give you a summary of everything that was installed:
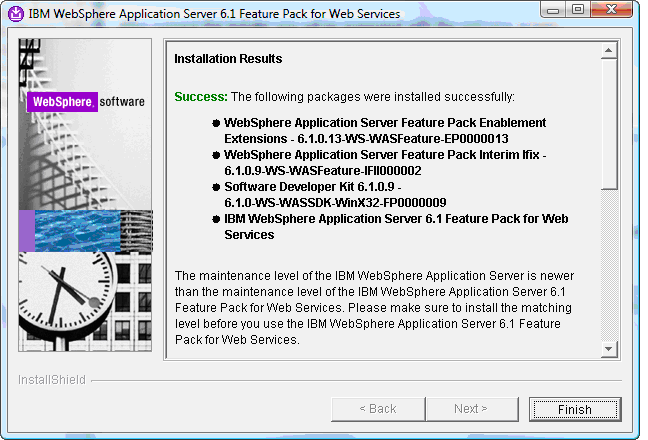
and after clicking Finish the Profile Management tool will open automatically for you. If you want to create a separate profile for web services feature, the profile management tool will help you through or else you can also create the profile at any later point of time(jst cancel the PMT wizard if you want to create the profile later).
You have now completed adding the Web Service Feature Pack to your WebSphere install. You are ready to continue on to the next section.
Applying Updates PK53084 Interim Fix and Web Service Feature Pack
Now that we have updated WebSphere and added the Web Service Feature Pack, we need to apply two updates for the Web Service Feature Pack that are available:
- 6.1.0.9-WS-WASWebSvc-IFPK53084.pak
- 6.1.0-WS-WASWebSvc-WinX32-FP0000013.pak
Both of these files, because they are PAK files, must be copied or moved into the /maintenance directory as shown earlier in this document(refer step 3.3)
And as we did before with the WebSphere update, we now want to run the Update Installer again by launching it from the Start Menu.
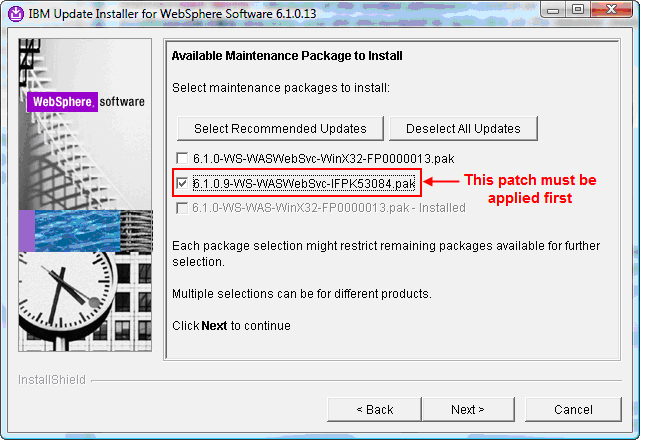
As before we "Next" our way through this wizard, confirming the WebSphere install to upgrade and so on. When we reach the page showing us a list of updates to apply, there are two listed:
Important Note
Please make sure the interim fix pack for web services(PK53084) be installed first before installing the web services fix pack as shown in the above image or else updated installer will not allow us to proceed further.
At this point you can only select the 6.1.0.9-WS-WASWebSvc-IFPK53084.pak and apply it, so go ahead and select only that 1 patch and apply it first:
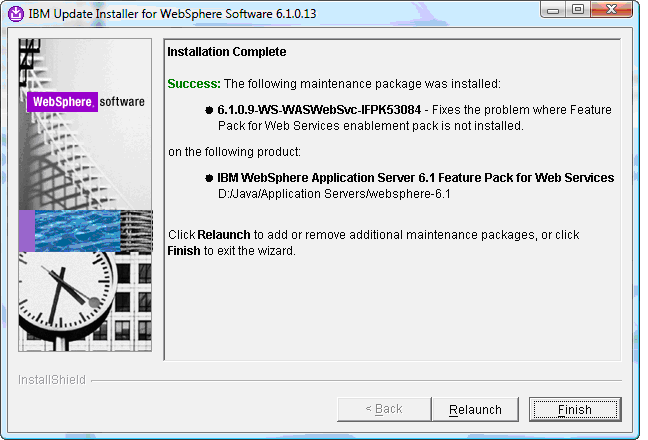
After it is done, click Relaunch (or Finish, then manually restart the Update Installer) and walk your way back through the wizard to the point where the only remaining update is listed, and select it:

Now the updater will run and apply that last update to WebSphere:
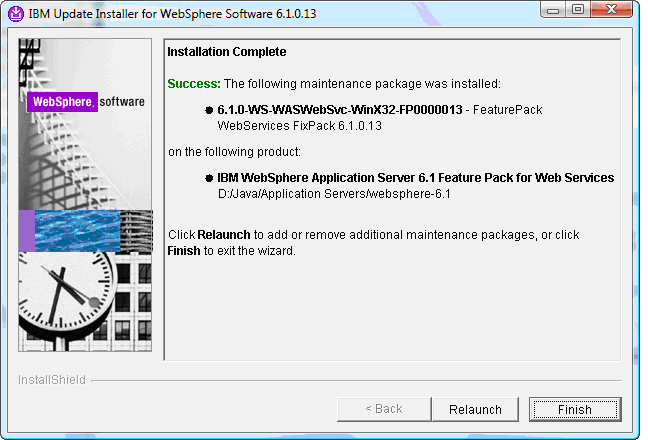
Once that has applied, you can click Finish.
This is how we end our installation process.
You are all set to get going with the Java EE JAX-WS web services specification on Websphere 6.1
Happy Reading :)

|
|